The Shed - resources.
This page includes articles, software tools and files that may be of use to the homebuilder or do-it-yourselfer.
Extended Sunvisor Pattern (Peter Heal)
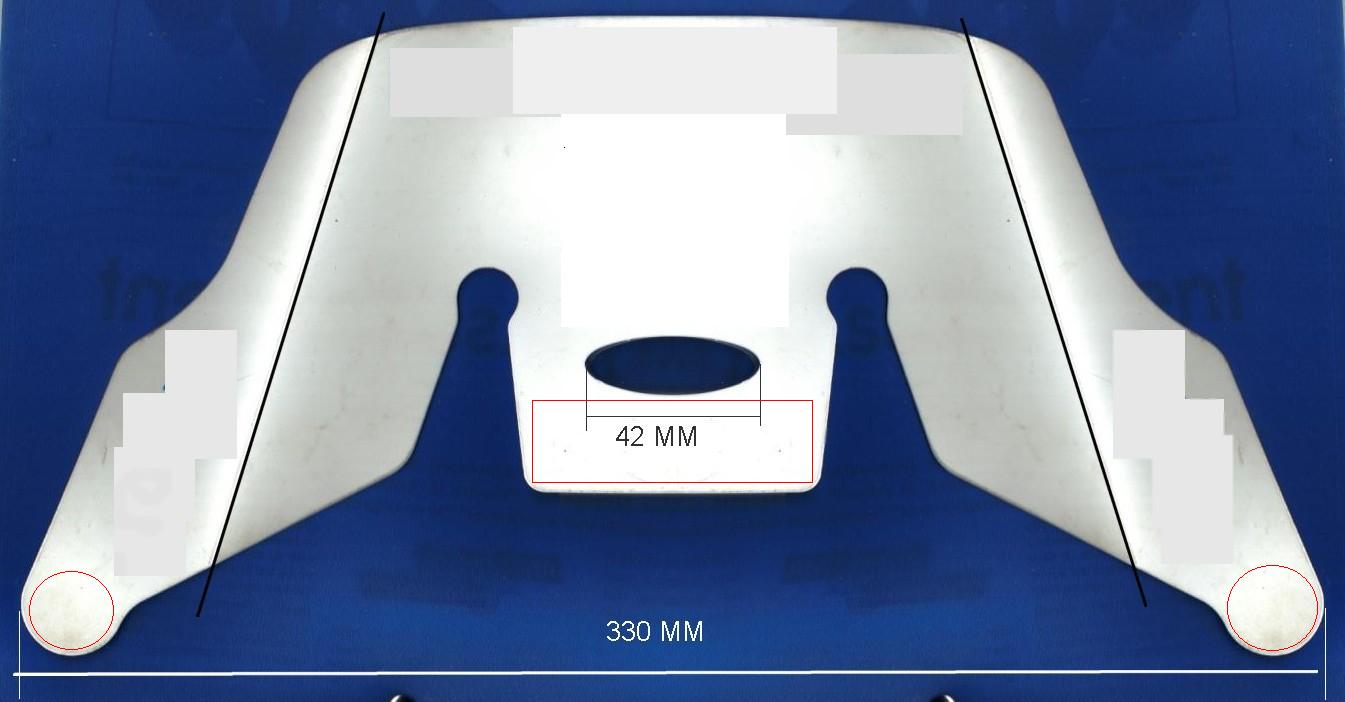
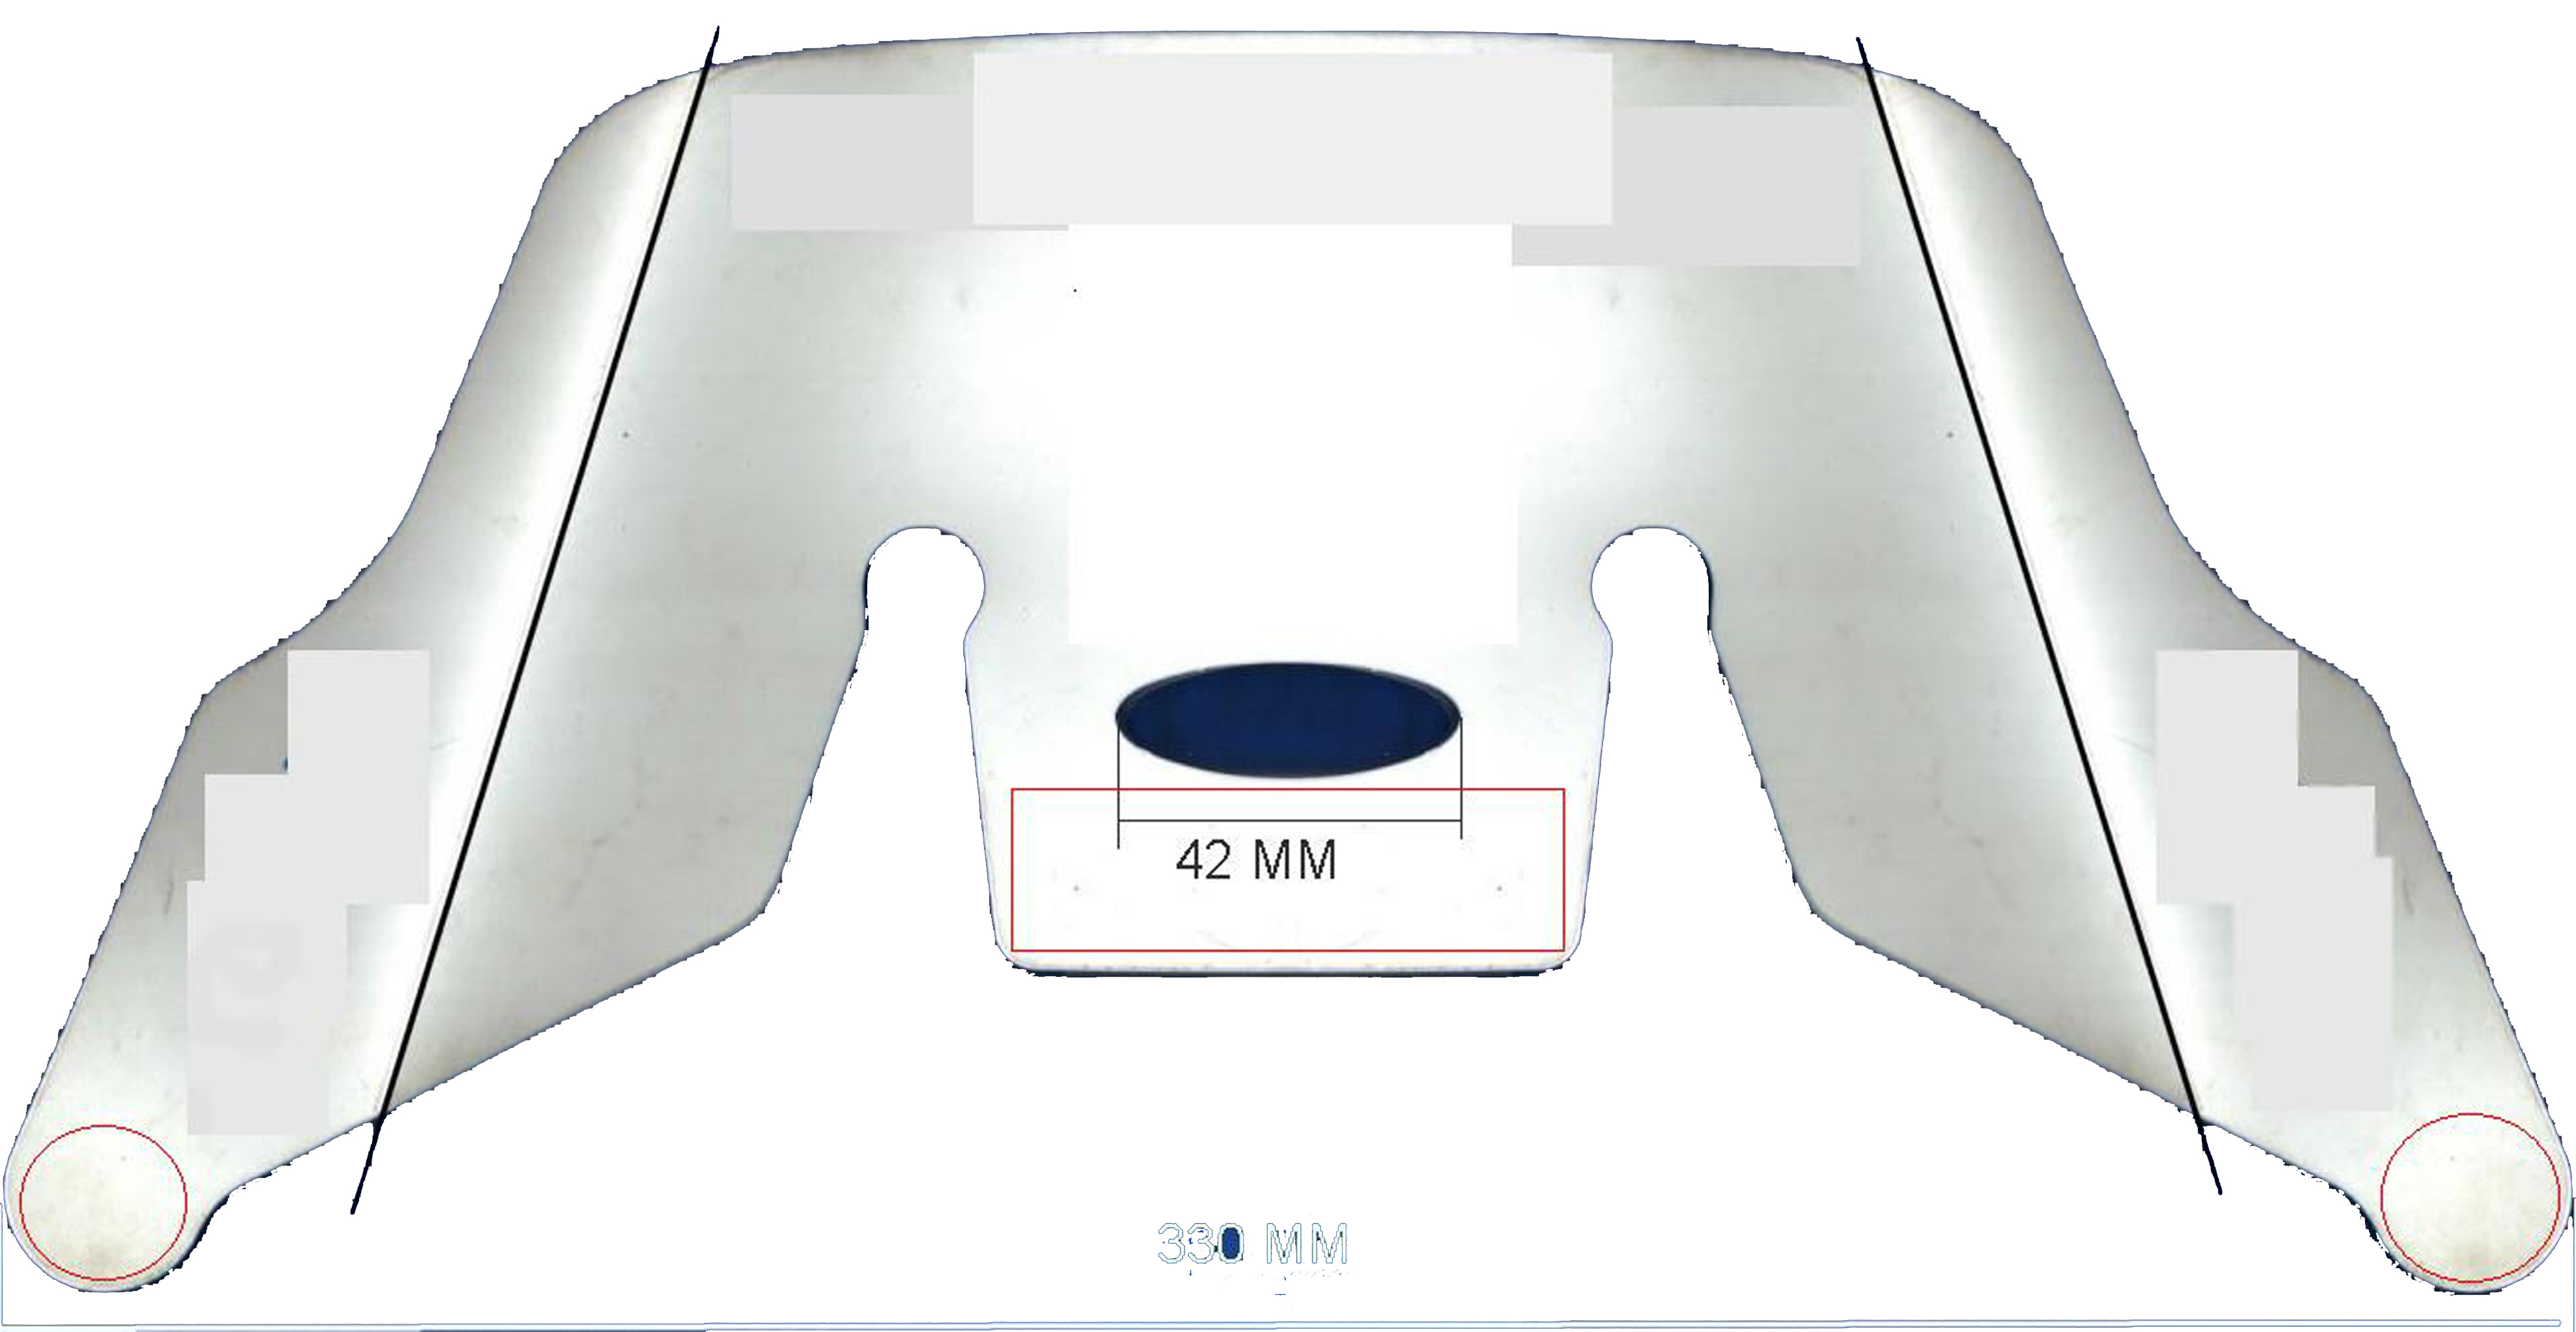
 I've been using a plastic visor that Duncan Cleland scored as a freebie on one of the mass rides. It's perfect for HPVs because it is very big and can be tilted forward on your helmet. Works great on the lowracer with the reclined seat. I scanned the outline and indicated where the couple of velcro patches should go in red. The diagonal black lines are where the plastic needs to be "scored" to enable it to fold. The plastic material is quite thin (about 1mm) and similar to a plastic presentation folder.
Tubemiter.exe (Giles Puckett)
A tube mitering program for Windows to print on any printer. The program works with metric units.
Instructions- File/Settings... puts up a dialog box. You input:
- Diameter (in mm) of tube being mitered
- The wall thickness of this tube
- The second tube diameter (the one it abuts up to)
- The included angle in degrees.
It paints the picture on the window, and File/Print... prints it on any connected printer.
There are two curves - the dotted one is the template you would cut if the wall thickness were zero (similar to the HyperCard program's output) and the solid curve is the template corresponding to the requested wall thickness.
If the mitered tube diameter is greater than the second diameter, then the second tube passes through two holes in the mitered tube. This situation is handled by continuing the template on the other side. Small gaps may appear in the curves; this is a known "feature" of the way the program works.
Chainring Patterns (Giles Puckett)
Download the program (zip 48 kb)
This program lets you generate a sprocket of any size, round or elliptical, with any PCD. I wrote this because I ran out of patterns from my old program of many years ago, and needed some more. Also, there has been a steady demand for them. You can make nice chainrings for old non-standard crank spiders, or experiment with elliptical chainrings. Biopace chainrings are close to ellipses with a small eccentricity of about 10% (greater for smaller tooth counts) There are only two menu items:
- File/Settings... brings up a dialog box to allow you to change things:
- the pitch of chain (usually 0.5", expressed as a standard chain type)
- number of teeth
- eccentricity, expressed as a percentage by which the major axis exceeds the minor. Leave zero for a round sprocket.
- the bolt hole PCD (this is usually 110 or 130, but can be anything)
- the number of bolt holes (usually 5)
- the size of the bolt holes (8 and 10mm are common)
- the size of the mounting circle (usually 16mm less than the PCD for 10mm bolts)
- the angle the crank makes with the major axis of the ellipse
- the amount of metal left between the scalloped cut-outs and the teeth. Make a large number to get rid of the scallops.
Hot Topics
Upcoming Events
Discover what's coming up.
Challenge
The 2014 OzHPV Challenge was held on September 27-28 in Corryong, Victoria. See photos and results here.